7

I printed this Curvy vase from Thingiverse and it came out pretty well on my Chiron.

Curvy vase print

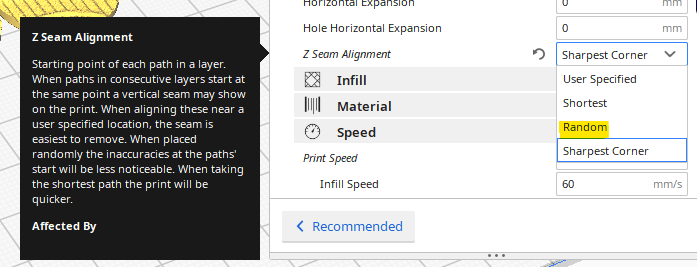
However, I am not happy with the Z-seam that is very large. When I look at other people's problems with this, they often seem to have too little filament at the seam, but I have too much. What setting should I change to make it less visible?

  • Printer: Anycubic Chiron with Marlin 2.0.7
  • Material: PLA
  • Slicer: Cura 4.8.0.
  • Nozzle: 0.4 mm

All Cura settings are here (except that I lowered printing temperature to 200 ºC while printing).

All files used and some pictures are here.


2021-03-07 Addendum after I made 19 test-prints of a small portion of the vase's neck. Below are some of my notes:

  1. Combing Mode=All is better than Off
  2. Speed=60 is worse than 40
  3. Retract Before Outer Wall=On is worse than Off
  4. Outer Wall Line Width 0.45 to 0.35 gave a Z-seam on the outside with more build-up
  5. Inner Wall(s) Line Width 0.45 to 0.35. Some places has less contact between layers, so less appealing and less robust. Also less material use.
  6. Outer Wall Wipe Distance 2.0 spread ot the seam (too much), and also made a ditch before the Z-seam (on the outside of the ring).
  7. Coasting tripled to Vol=0.588 and Wipe Distance 5.0 is more appealing. Two changes at once make it impossible to know which one helped. 5 mm is not enough to completely wipe.
  8. 50% printing speed improved Z-seam and surface smoothness

In the future I will use slower speed for Outer Walls, test Wipe distance=2*Line Width, use Combing (turned Off because of some advice to do so when LIN_ADVANCE is used) and experiment with faster retractions and Z-movement. Pictures and complete notes are available here.

dotswe
  • 380
  • 1
  • 2
  • 11

4 Answers4

6

There is a Cura option to choose a random seam alignment in the shell menu:

enter image description here

Z-seam alignment

This setting allows you to choose where each new layer in the Z direction starts and affects where the seam of the model will be. This is useful for models with consecutive equal layers as the seam can be visible. By changing the Z-seam alignment you can decrease the visibility of the seam. The options available are:

  • User-specified: Set a coordinate for the X and Y direction of the Z-seam. This coordinate is absolute by default. Example: X 100, Y 200 will move the seam to the center back of the model.
  • Shortest: The next layer starts at the endpoint of the previous layer. This is the fastest way of printing, but also creates the most visible seam.
  • Random: The next layer starts at a random point of the previous layer, which eliminates the chance of a seam. Print time will increase due to the necessary travel moves.
  • Sharpest corner: This puts the seam in the sharpest inward or outward corner of the model, when available. This is the best method to completely hide the seam.
Trish
  • 22,760
  • 13
  • 53
  • 106
4

This Cura support page lists the options for Shell settings, specifically:

Seam corner preference

The Z-seam is hidden as much as possible by default. However, for some projects, specifically those that require post-processing, exposing the seam can be necessary for the post-print processing. To do so, you can adjust the following settings:

  • None: The seam will remain on the Z-seam alignment location.
  • Hide seam: The seam will be hidden as much as possible.
  • Expose seam: The seam will be exposed as much as possible.
  • Hide or expose: The seam will be hidden when possible and exposed when there is no other option.

In your setting, you have "None". You may need to set it to "Hide seam".

agarza
  • 1,734
  • 2
  • 16
  • 33
3

A bulging seam is caused by a mix of factors, especially:

  1. Material oozing while dwelling too long at the point of layer change (including the time spent in the Z move). This can be mitigated by ramping up the max Z speed and acceleration and/or enabling retract at layer change with a very fast retract and unretract speed (without doing it very fast, the time spent retracting has the same effect as the time spent on Z move).

  2. Excess extrusion due to pressure remaining at the nozzle when decelerating. This can be mitigated by enabling Linear Advance and tuning the K factor for your printer's bowden tube and material properties. A value around 0.5 is probably needed for PLA on your printer. Increasing your acceleration limit to reduce the time spent accelerating/decelerating can also go a long way to mitigate this.

2

Use Cura's "Vase Mode" (known as Spiralize Outer Contour) for seamless printing.

0scar
  • 37,708
  • 12
  • 68
  • 156
markcosmic
  • 21
  • 2