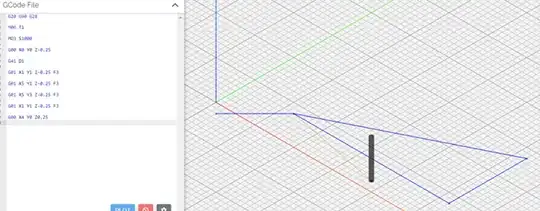
There is no rectangle, the assignment is wrong. In order to make a rectangle, the G-code should have been:
...
G01 X1 Y1 Z-0.25 F3
G01 X5 Y1 Z-0.25 F3
G01 X5 Y3 Z-0.25 F3
G01 X1 Y3 Z-0.25 F3 ; <-- missing line
G01 X1 Y1 Z-0.25 F3
...
Then the rectangle would have been 2 by 4 inches.
As noted in the comments, the assignment is even more unclear. The code shows an offset to be taken into account of tool D1 in the cutter compensation code G41. It further doesn't specify the characteristics of that tool. If it is differently than the end mill currently in the tool head, than the difference in diameter between the D1 tool and the current 0.5" tool needs to be taken into account. The power of using cutter offset definitions is that the same code can be used for different tools, you only needs to set the correct offset. If the D1 tool is defined as a 1" diameter tool, the current tool is half that size, as there is a compensation for 1" at play while a half inch end mill is used, the end product will be larger.

